

Bending a round pipe looks simple until you try it. The moment you apply force, the metal fights back. It wants to flatten, wrinkle, and crack rather than curve cleanly.
This guide walks through the precautions that separate a clean bend from a ruined piece. It's written for hobbyists and everyday readers, not engineers, so you can get good results without a workshop full of gear.
Why Bending Round Pipe Is Trickier Than It Looks
A round cross-section has no flat side to push against. When you bend it, the tube tries to collapse inward to relieve the stress.
That's why a bend that feels gentle by hand can still leave you with a kinked or oval pipe. Understanding what actually happens to the metal makes the rest of these precautions click into place.
What Actually Happens to the Metal in a Bend
Picture the curve. The outside of the bend has to travel a longer path, so the metal there stretches and gets thinner.
The inside travels a shorter path, so that metal gets squeezed and bunches up. Stretch on the outside, compression on the inside - every single time.
The Real Risk Behind Tube Bending Wall Thinning
Because the outer wall stretches, it loses thickness. Push too hard or bend too tight, and that thinned wall is where a crack or split begins.
Keep this in mind: failure almost always starts on the outside of the curve, not the inside.
Precaution 1: Respect the Round Pipe Bending Radius
This is the single most important rule. Every pipe has a minimum bend radius - the tightest curve it can take before it deforms or fails.
The trade-off is straightforward. A tighter bend looks neat but stresses the metal far more. A looser, larger radius is always safer.
A Simple Rule of Thumb for Beginners
A common starting point is to keep your bend radius at least three times the pipe's outside diameter. So a one-inch pipe wants a three-inch radius or bigger.
Thinner-walled or larger-diameter tubes need even more breathing room. When in doubt, go gentler than you think you need.
Precaution 2: Stop Wrinkles Before They Start
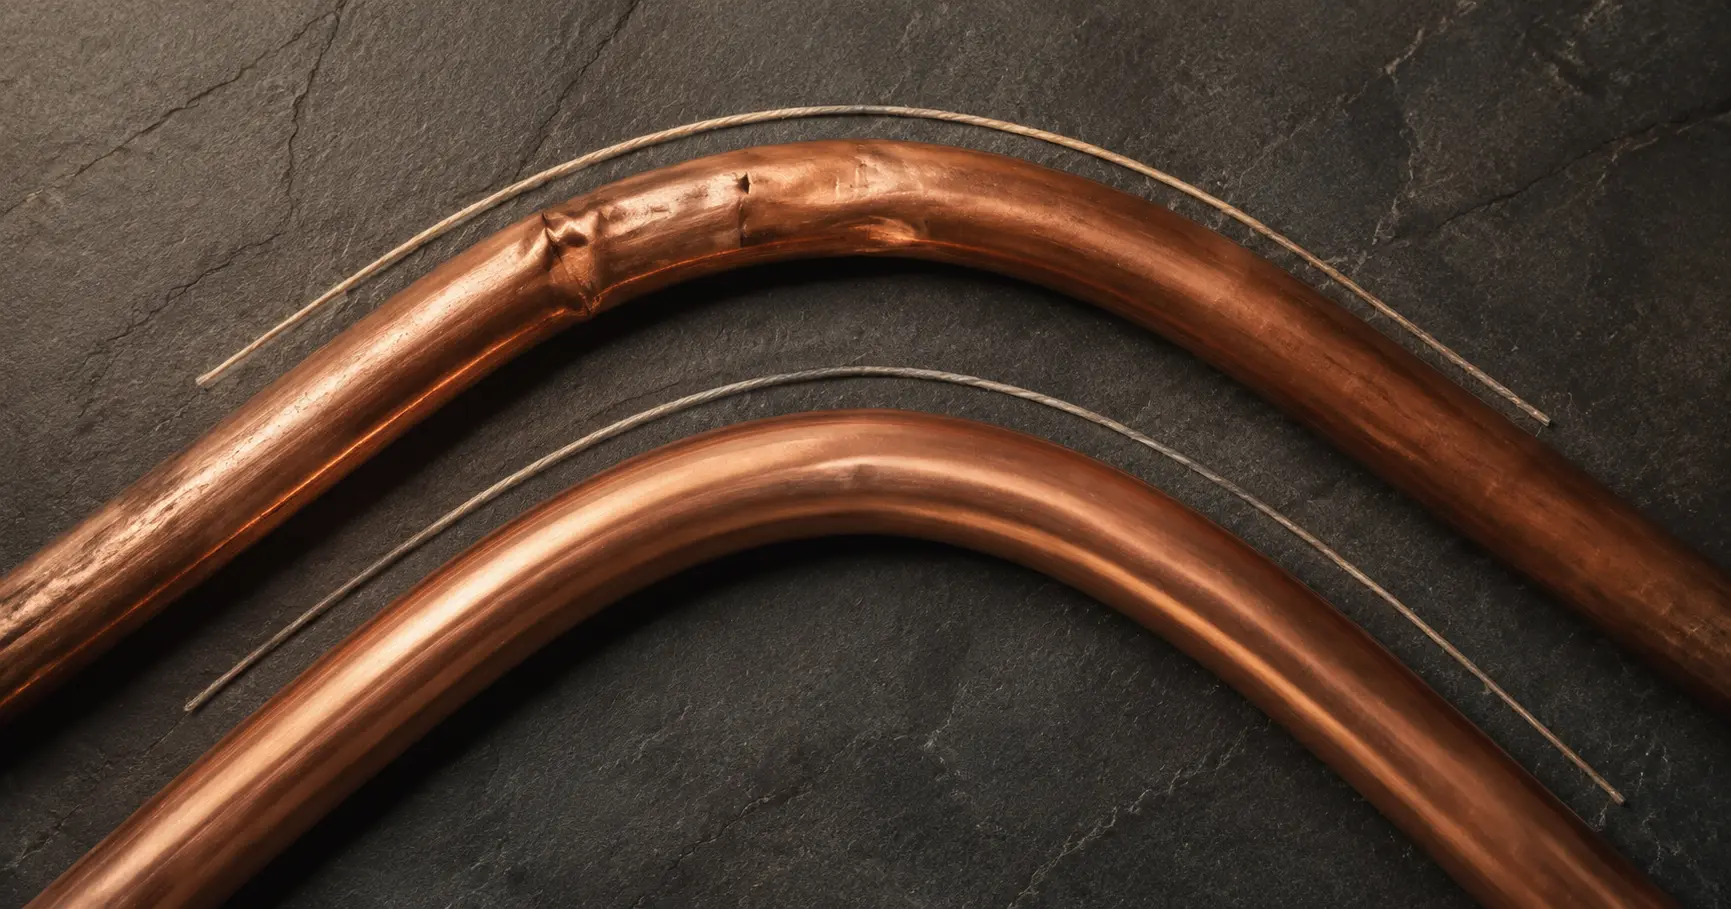
Wrinkles form on the inside of the curve, where compressed metal has nowhere to go. Effective pipe wrinkling prevention is mostly about supporting the wall during the bend.
Once a wrinkle appears, it's nearly impossible to remove cleanly. Prevention beats repair every time.
Support, Fill, and Speed
For simple jobs, packing the tube with dry sand or inserting a coil spring gives the walls internal support. The filler resists the inward collapse that causes flattening.
Speed matters too. Steady, slow pressure lets the metal flow into the bend evenly. A fast yank concentrates stress and invites kinks.
Precaution 3: Match the Method to the Job
There is no single best way to bend a pipe. The right method depends on the material, wall thickness, and how tight your curve needs to be.
Picking the wrong approach is one of the most common - and costly - mistakes, so a quick comparison is worth your time.
| Method | Best For | Watch Out For |
|---|---|---|
| Sand or spring fill | Light hobby work, soft tubing | Limited on tight radii |
| Mandrel bending | Thin walls, tight clean curves | Needs proper tooling |
| Cold bending | Most general steel pipe | Higher spring-back |
| Heat bending | Thick or stubborn material | Can weaken the metal |
Mandrel Bending Techniques for Clean Curves
A mandrel is a support that sits inside the tube during the bend. It holds the round shape so the pipe cannot flatten or wrinkle, even on tight curves.
Mandrel bending techniques are worth the extra effort when you need a smooth, near-perfect curve in thin-walled tube - exhaust or handrail work, for example.
Cold Bending Steel Pipe vs. Heating First
Cold bending steel pipe means shaping it at room temperature. It's clean, fast, and preserves the metal's strength, which is why it suits most everyday jobs.
Heating first softens the metal so it bends with less force - helpful for thick or stubborn pipe. The downside: heat can weaken the material and discolor it. Use it only when cold work struggles.
Precaution 4: Prep, Mark, and Test First
Good results start before you apply any force. Deburr the cut ends so cracks have no rough edge to spread from, and clean off scale or rust.
Mark your bend line clearly and note which direction the curve should face. Then make a test bend on a scrap offcut to confirm your radius and spring-back before touching the real piece.
Safety Basics People Skip
Wear gloves and eye protection. Pipes can spring back sharply, and burrs cut fast.
Clamp the work securely so nothing slips mid-bend. Always expect a little spring-back - the pipe relaxes open slightly after you release pressure. Bend a touch further to land on your target angle.
Get these four precautions right-radius, wrinkle control, the proper method, and solid prep-and clean round pipe bends become repeatable rather than lucky.
FAQ
Q: How Small A Radius Can I Bend Without Cracking?
A: As a safe starting point, keep the radius at least three times the pipe's outside diameter. Thinner walls and larger pipes need more. Anything tighter raises the risk of wall thinning and cracking.
Q: Why Does My Pipe Keep Flattening On The Curve?
A: Flattening happens because the walls have no support during the bend. Fill the tube with sand or a spring, or use a mandrel, and slow your bending speed so the metal moves evenly.
Q: Do I Need To Heat The Pipe Before Bending?
A: Usually no. Cold bending works fine for most general steel pipe and preserves the metal's strength. Reach for heat only when the material is thick or too stubborn to bend cold.
Q: What Causes The Wall To Crack On The Outside Of A Bend?
A: The outer wall stretches and thins as it curves. If the radius is too tight or you force the bend too quickly, that thinned wall hits its limit and splits. A larger radius and steadier pressure prevent it.
